-
Making out the position
First of all you have to decide where and how you want to fit the veranda. Measure how long and wide you want the roof to be, and where the posts have to be placed. Start by making an overall sketch, and then decide exactly what materials of which sizes you will need. When you’ve decided on the place of the veranda, mark out the exact position with cord.
-
Drainage
If you’re fitting the veranda to the wall, you should build the roof at an angle of at least 5 degrees. This represents a slope of approximately 10 to 12 cm for each linear meter on the ground. A steeper slope is even better if you expect a greater snowfall in the winter. If you’re building a flat roof, make a finishing trim with a drainage pipe at the edge.
-
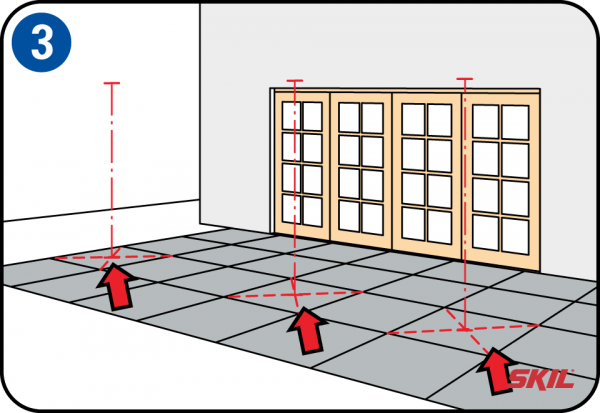
Marking-out
To mark out the posts, place marking lines outside the cords. Place the posts at distances of 2 to 3 meters, in the center of a floor tile to prevent sinking. These posts support the horizontal cross-beams, across which you fix the cross-beams. It’s easier to fit the roof if there are two of you working together.
-
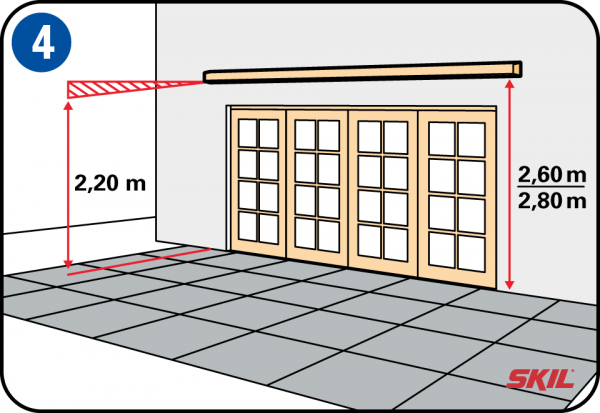
Fitting the wall beams
The wall beam is fitted against the wall which will hold the supporting beams.This wall beam is of the same wood thickness as the supporting beams. Work out the height at which the wall beams have to be fitted. Allow a slope of at least 10 to 13 cm per meter. In our case we take 10 x 4 cm = 40 cm. You need a standing height of at least 2.20 meters at the front.
-
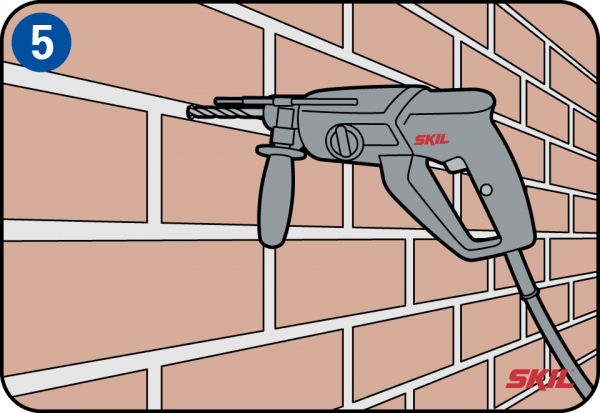
Fixing the wall beam
First pre-drill the holes in the wall beam. Hold the beam against the wall and mark out the center of the brick or in the pointing between the bricks. You can use the pointing in a row of bricks as a guide, to fix the beam so that it is visually horizontal.
Pre-drill the holes for the wall plugs, and use a spirit level to check that the wall beam is horizontal. The joint is at the center beam.
-
Using hammer fixings
Use hammer fixings, these have a steel nail or a special screw, and are driven into the plug with a hammer. This is a lot faster than using screws, and is ideal for fixing the wall beam. Tighten the screw with a screwdriver after driving it onto the plug.
-
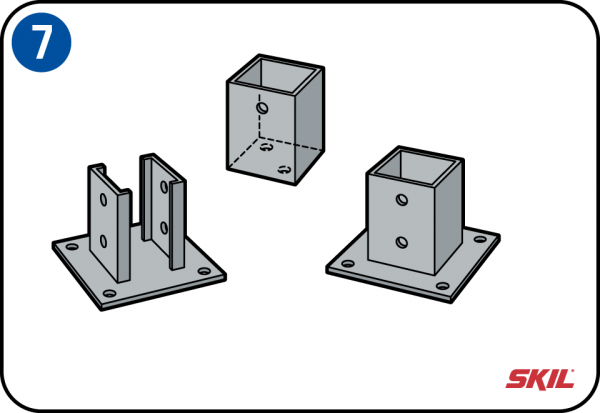
Post supports for fitting to paving stiles or stones
If you don’t want to break the paving tiles or stones, or if you don’t have the tools to do it, screw-on post holders are a good option. These simply screw into place onto the tiles or paving stones to fix the posts into position. Make sure the posts remain vertical and are properly aligned – check this with a spirit level or a plumb-line.
-
Central post of the veranda
The central post is placed in the middle, as shown by the indicator marks. Run a cord between both end-posts, and make sure the top edges of all the posts are properly aligned.
-
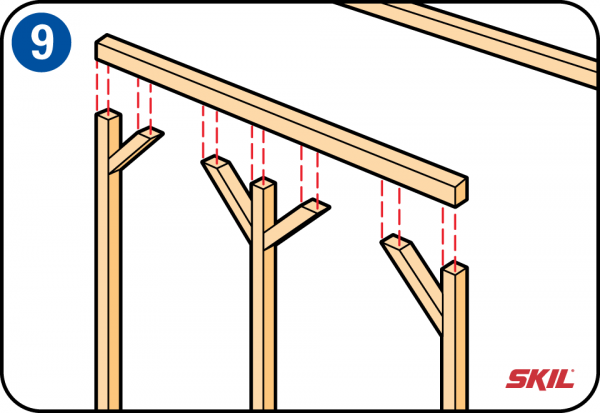
Fitting the front beam to the posts
A beam of the same size as the wall beam is fitted at the front, across the top of the 3 posts. To ensure the roof is stable, the posts are provided with extra diagonal supports, secured by screws of the right length. Here too, it’s essential to pre-drill the holes for the screws.
-
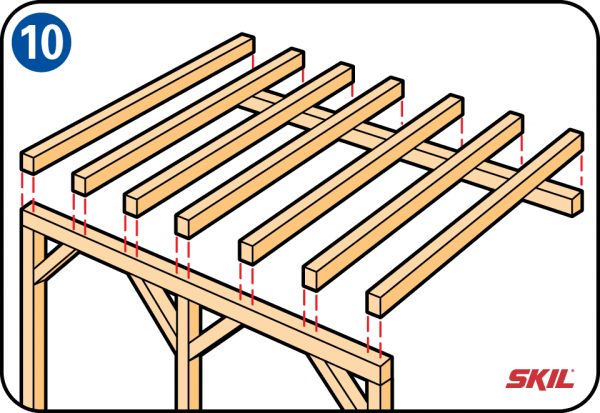
Fitting the roof beams
When you’ve securely fastened the front beam and made sure it’s properly horizontal, you can fit the roof cross-beams to the supports. Here again, make sure you use screws of the right size. These should be placed over the 7 cross-beams with a spacing of 1 meter between the beams. After that, all you have to do is finish the roof, for example with wooden panels, metal profile sheets or translucent polycarbonate.
-
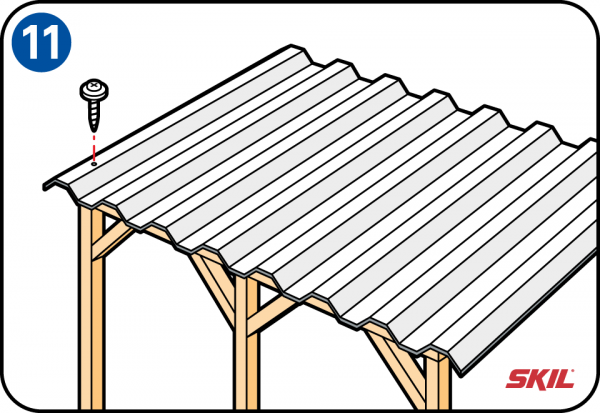
Metal profile sheets
Metal sheets are easy to install – these profiles are strong, and let you make a watertight surface for your veranda using screws fitted in rubber rings. Give the panels an overlap to make sure the roof is watertight. Wear working gloves because the panels have sharp edges. You can fit a serrated profile against the wall with the same shape as the roof panel, and seal the top edge for a watertight seal against the wall.
-
Translucent polycarbonate
If you want a translucent roof, it’s a good option to use transparent 16 mm polycarbonate panels. These are strong and easy to fit. It’s also easy to seal them with matching edge profiles. You can use an aluminium profiles at the top edge of the wall. Use silicone seal to close the gap between the top edge of the wall and the profile. Degrease the whole edge before you apply the silicone seal. Another option is to use a thick draughtproofing strip or a double rubber strip, and secure it with wall plugs and screws.
-
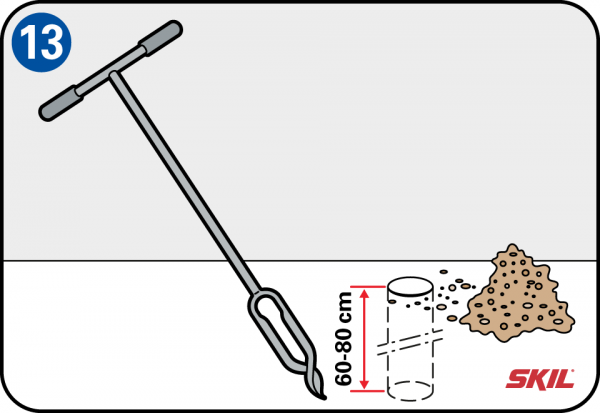
Securing the posts in the ground
If you want to secure the posts in the ground, start with the corner post and follow the markings. Use a narrow spade or ground drill to dig a narrow hole of 60 to 80 cm deep. You need to dig right down into the solid ground to secure the posts. It’s a good idea to first moisten the ground before you insert the posts, then it’s easier to make the holes.
-
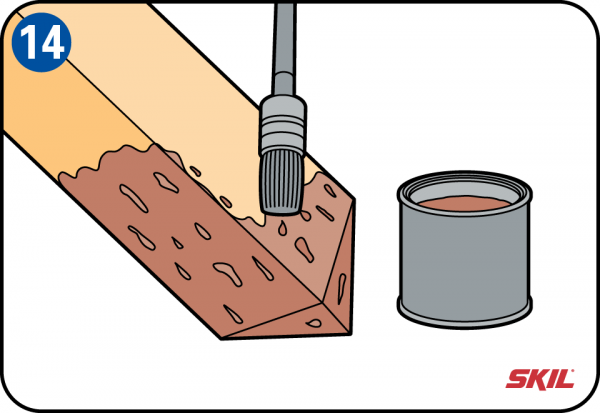
Applying protection
For protection and to prevent rotting, you can protect the lower part of the posts with bitumen or varnish.
-
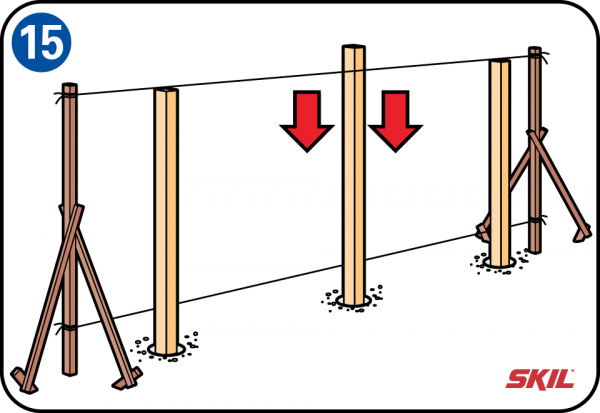
Fitting the posts
Fit the 3 posts in the holes at the same height as the centerline of the markings. Carefully drive the posts into the ground with a sledgehammer, until the tops of the posts are at the right height. Constantly check that the posts are vertical while you are driving them in with the hammer. Always wear working gloves to protect your hands from splinters.
-
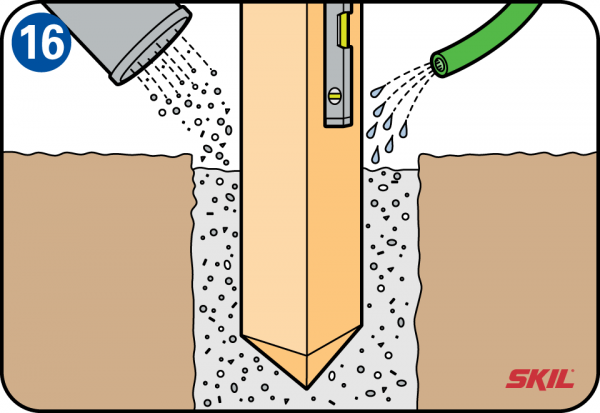
Pouring concrete
Pour concrete into the holes. The amount of concrete you need depends on the number of posts. Use a concrete mixture of 1 kg of coarse sand, 1 kg of gravel and 0.5 kg of cement. You can also pour quick-drying dry mortar out of a bags into the holes and then add water. Make sure the posts remain properly vertical and in line, and check this with a spirit level or plumb-line while you are working. Finally, stamp the posts firmly into the ground using the handle of the sledgehammer.